Having a reliable set of cleaning products is essential for maintaining a tidy, healthy home—but that doesn’t mean you need to rely on harsh chemicals or expensive brands.
With a few simple, natural ingredients and reusable tools, you can assemble a powerful, eco-friendly cleaning kit that keeps your home fresh while being safe for your family, pets, and the environment.
This guide will walk you through everything you need to build a natural, low-cost cleaning kit from scratch.
You’ll learn which ingredients and tools are essential, how to store your supplies, and how to mix common DIY cleaning recipes for every room in your house.
Why Build a Natural Cleaning Kit?
Choosing to build your own natural cleaning kit has major advantages:
- Health-conscious: Avoid harmful fumes, allergens, and skin irritants
- Cost-effective: Most DIY cleaners cost less than $1 per bottle
- Eco-friendly: Reduce plastic waste and toxic runoff
- Customizable: Control fragrance and strength for specific needs
- Simple: One ingredient often serves multiple purposes
Instead of relying on a shelf full of commercial products, you can clean your whole home using just a few basic ingredients and homemade formulas.
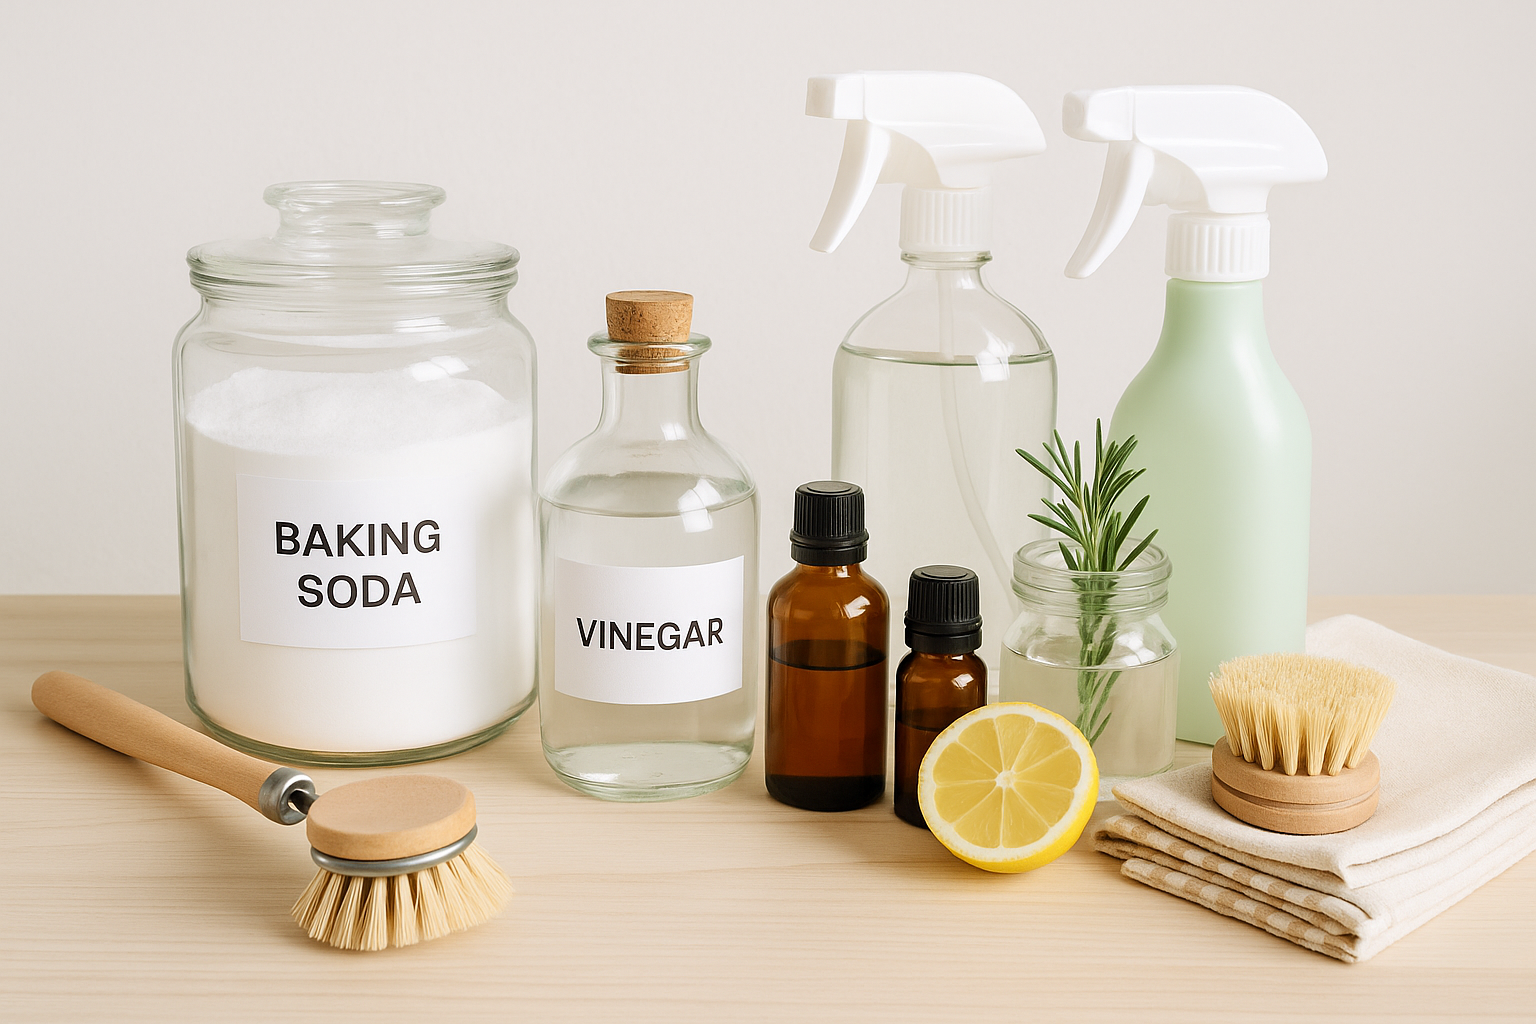
Step 1: Core Natural Ingredients to Include
These ingredients form the foundation of almost every natural cleaning recipe. Most are already in your pantry or can be found cheaply at any grocery store.
1. White Distilled Vinegar
- Purpose: Disinfects, deodorizes, cuts grease, dissolves mineral buildup
- Best for: Glass, countertops, tile, bathrooms
- Avoid on: Natural stone surfaces (marble, granite)
2. Baking Soda
- Purpose: Deodorizes, scours, removes stains, softens water
- Best for: Sinks, tubs, ovens, and neutralizing odors
3. Castile Soap
- Purpose: Plant-based liquid soap that lifts dirt and grease
- Best for: All-purpose sprays, dish soap, hand soap
4. Hydrogen Peroxide (3%)
- Purpose: Disinfectant, stain remover, whitener
- Best for: Toilets, cutting boards, laundry, mildew
5. Rubbing Alcohol (70%+)
- Purpose: Quick-drying surface sanitizer
- Best for: Electronics, glass, doorknobs, light switches
6. Lemon Juice
- Purpose: Bleaches stains, cuts grease, adds fresh scent
- Best for: Brightening surfaces and boosting vinegar effectiveness
7. Essential Oils (Optional)
Add fragrance and antibacterial properties. Most used:
- Tea tree (disinfecting)
- Lavender (calming)
- Lemon (deodorizing)
- Eucalyptus (refreshing)
- Peppermint (cooling, antimicrobial)
Step 2: Reusable Cleaning Tools
Next, you’ll need some durable, eco-friendly tools to apply your cleaners. Choose reusable over disposable when possible.
Essentials:
- Spray bottles (glass or BPA-free plastic): For your cleaning mixes
- Mason jars or small containers: Store powders, pastes, or pods
- Measuring cups and spoons: For precise mixing
- Funnel: To avoid spills when filling bottles
- Microfiber cloths: Reusable, lint-free, and perfect for glass and general cleaning
- Scrub brushes: For grout, tubs, and stubborn spots
- Old toothbrushes: Great for corners and crevices
- Bucket: For mopping or soaking tools
- Sponge or reusable scouring pads: For scrubbing without waste
- Rubber gloves: Optional, but helpful when using acidic ingredients like vinegar
Optional additions:
- Spray label stickers
- Chalk marker or permanent marker
- Caddy or tote bag to carry your kit around the house
Step 3: DIY Cleaning Recipes for Your Kit
Now that you have your ingredients and tools, let’s put them together into effective recipes you can bottle and label for daily use.
1. All-Purpose Cleaner
Use for: Counters, walls, doorknobs, appliances
Recipe:
- 1 cup white vinegar
- 1 cup distilled water
- 10–20 drops essential oil (lemon, lavender, eucalyptus)
- Spray bottle
Shake before each use. Avoid on stone surfaces.
2. Glass and Mirror Cleaner
Use for: Windows, mirrors, and chrome
Recipe:
- 1 cup rubbing alcohol
- 1 cup water
- 1 tablespoon white vinegar
- Optional: 5 drops lemon oil
- Spray bottle
Wipe with a microfiber cloth or newspaper for a streak-free finish.
3. Disinfecting Spray
Use for: Light switches, phones, countertops
Recipe:
- 1 cup rubbing alcohol or hydrogen peroxide
- 10 drops tea tree or eucalyptus oil
- Spray bottle
Let sit for 30 seconds before wiping.
4. Scrubbing Paste
Use for: Bathtubs, sinks, tile grout, oven doors
Recipe:
- 1/2 cup baking soda
- Enough water to form a paste
- Optional: Add a few drops of castile soap
Apply with a sponge, scrub, and rinse clean.
5. Toilet Bowl Cleaner
Use for: Weekly deep cleaning
Recipe:
- 1/2 cup baking soda
- 1/2 cup white vinegar
- 5 drops tea tree oil (optional)
Pour into bowl, let fizz for 10 minutes, scrub, and flush.
6. Floor Cleaner
Use for: Tile, vinyl, sealed hardwood (spot test)
Recipe:
- 1/4 cup vinegar
- 1 tablespoon castile soap
- 1 gallon warm water
- Optional: Lemon oil for scent
Use with a mop or spray directly on the floor and wipe.
7. Fabric Freshener & Linen Spray
Use for: Bedding, curtains, upholstery
Recipe:
- 1/2 cup water
- 1 tablespoon vodka or rubbing alcohol
- 10 drops lavender or citrus essential oil
- Spray bottle
Shake and spritz as needed.
8. Drain Deodorizer
Use for: Sinks, tubs, garbage disposal
Recipe:
- 1/2 cup baking soda
- 1 cup vinegar
- Boiling water to rinse
Pour baking soda down drain, follow with vinegar. Let sit for 10–15 minutes, flush with hot water.
Step 4: Store and Organize Your Kit
Designate a space in your home—under the sink, in a closet, or a cleaning tote—for your natural kit. Label all spray bottles and jars clearly. Consider dividing your supplies by area:
- Kitchen caddy: Degreaser, glass spray, dish soap
- Bathroom caddy: Scrub paste, toilet cleaner, mildew spray
- General caddy: All-purpose, linen spray, disinfectant
Keep your tools (brushes, gloves, cloths) clean and dry between uses to avoid mildew.
Step 5: Create a Cleaning Routine Around Your Kit
Having a natural cleaning kit is great—but the real power comes from using it regularly. Build a simple weekly routine to stay ahead of dirt and mess.
Weekly sample plan:
- Monday: Kitchen surfaces + trash bins
- Tuesday: Mirrors + windows
- Wednesday: Bathroom deep clean
- Thursday: Floors
- Friday: Dusting + linens
- Saturday: Disinfect touchpoints
- Sunday: Quick whole-home refresh
Cost Comparison: Natural Kit vs. Store-Bought Products
Initial investment for DIY kit (approx.):
- Vinegar (1 gallon): $2
- Baking soda (4 lb): $2
- Castile soap (16 oz): $8–10
- Essential oils (starter set): $15–25
- Rubbing alcohol (32 oz): $2
- Reusable bottles and tools: $15–20
- Total: ~$40–$60
Compared to:
- Store-bought cleaner (each): $3–7
- Buying separate products for each surface can easily exceed $100
DIY kits pay for themselves within 1–2 months and produce far less waste.
Final Thoughts: Clean Naturally, Clean Powerfully
Creating your own natural cleaning kit is a simple but powerful act. It gives you control over what goes into your home, reduces your environmental footprint, and can even turn cleaning into a more enjoyable, satisfying experience.
You don’t need 15 products—just a few ingredients, basic tools, and a little know-how. Start by choosing one or two recipes to try this week. Label your bottles, set up your caddy, and begin your journey toward a cleaner, greener home—one spray at a time.

Márcio Luzardo is the creator of Dromiya, a site dedicated to practical home care and everyday living tips. Passionate about simplicity, organization, and smart routines, he shares clear, useful content to help people take better care of their homes with less stress and more confidence.
His goal is to make your daily life easier—one clean room, one helpful tip at a time.